
Stepping outside and imagining your dream garden, a stunning poolside retreat, or a lively entertainment zone is exciting. But before your vision transforms into striking 3D renderings and, eventually, tangible features, there’s a big question: What exactly do you need to send your 3D landscape designer?
For projects like those at Urban Oasis—where the goal is to create refined exteriors tailored to modern lifestyles—the first steps lay the groundwork for everything to follow. The stronger the foundation, the smoother the transformation. If you want every shrub, patio stone, and deck board to feel “just right,” it helps to get your designer started with the right information.
You might be wondering if you’ve captured enough inspiration, snapped the right photos, or detailed your patio dreams well enough. Maybe you’ve measured once and doubted twice. Or perhaps, if you’re like many homeowners, you just want a clear guide.
Let’s walk through everything worth gathering, documenting, and sharing—so you and your designer are ready for a seamless, creative journey from first sketches to final build.
A great design brief is the start of every outdoor masterpiece.
Understanding the designer’s process
Before diving into the checklist, it’s useful to see the process through the eyes of your designer. At Urban Oasis, specialists begin with a consultation, carefully listen, interpret your dreams and constraints, and then translate these into digital landscapes that blend form with function.
Every step builds on what comes before. According to North Carolina State University Extension, the landscape design process includes:
- Creating a base plan
- Detailed site inventory (conditions, assets, challenges)
- Design concept and 3D visualizations
- Refinements and client feedback
- Construction plans and implementation
So, what you send in the beginning doesn’t just help—they often shape every decision to follow. Better inputs mean fewer revisions and a result that feels truly yours.
Why a clear landscape design brief matters
Your landscape design brief is more than a wish list. It’s a conversation starter, a guide, and a compass—all rolled into one. Whether it’s for a cozy family courtyard or a multi-zone commercial space, a thorough brief saves time and keeps everyone aligned.
The pre-design planning worksheet from Oklahoma State University echoes this: Homeowners who identify their functional needs (like entertaining, play, privacy), aesthetic goals, and practical concerns set clear expectations for designers—making the project smoother at every stage.

Gathering what your designer needs: step-by-step
The big picture: vision and style
Start with imagination. How do you want your space to feel? Is it an inviting lounge for lazy weekends? Or a vibrant setting for entertaining guests? Gather:
- Personal inspiration – Photos (from magazines, Instagram, or places you’ve visited that sparked joy)
- Style references – Pin down moods: modern, rustic, Mediterranean, minimalist?
- Wishlist features – Pools, decks, fire pits, quiet corners for reading? List these with must-haves vs. nice-to-haves.
If it feels difficult to define your style, the University of Florida IFAS Extension suggests observing other landscapes that appeal to you. Save photos, note what catches your eye, and be honest about dislikes, too.
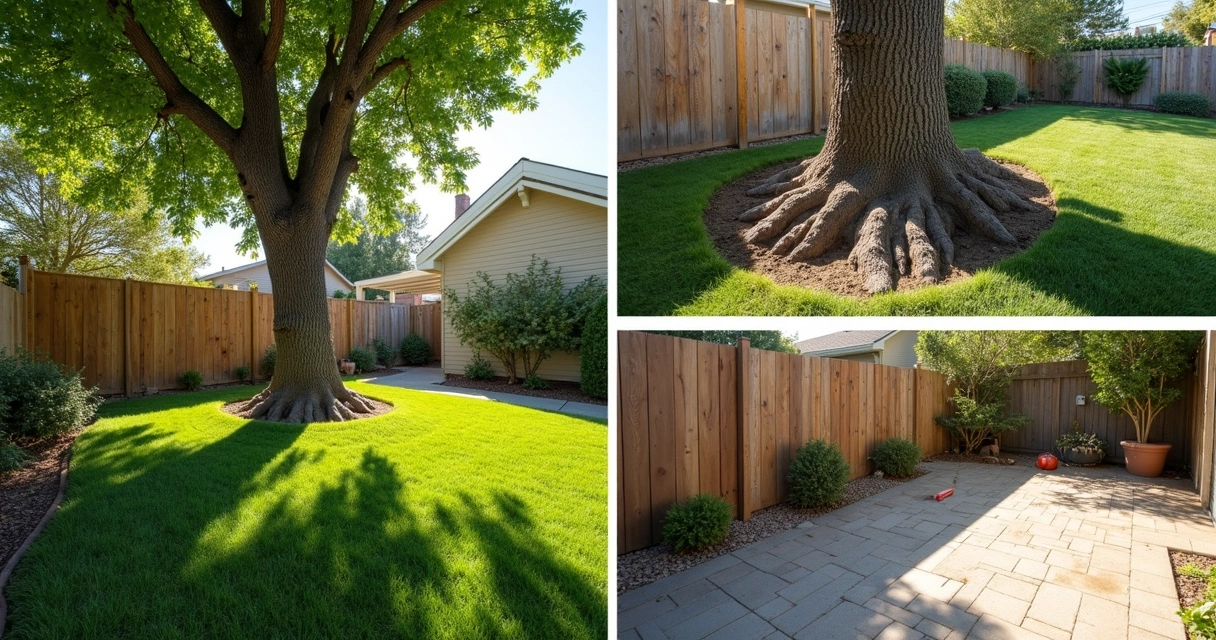
Site photos: more detail than you think
Your designer will want a full sense of your site’s atmosphere, quirks, and character. Smartphone snapshots can be enough if you take them thoughtfully. Just remember:
- Capture each corner of the property—including edges, gates, fences, and any big trees
- Stand at different points: near the entry, from your door looking out, and from property edges looking in
- Include any neighboring features: tall fences, views you want to shield, or spots that flood
The more perspectives, the better.
Include both overview shots and close-ups of problem areas or features to keep (like a favorite old tree). A sunny photo, one on a cloudy day, and a few at sunset can reveal how light shifts—a detail that matters when placing decks and patios.
According to Mississippi State University Extension, this site analysis phase is key. It helps your designer understand sun and shade patterns, wind spots, soil type, and even tricky slopes that might complicate construction.
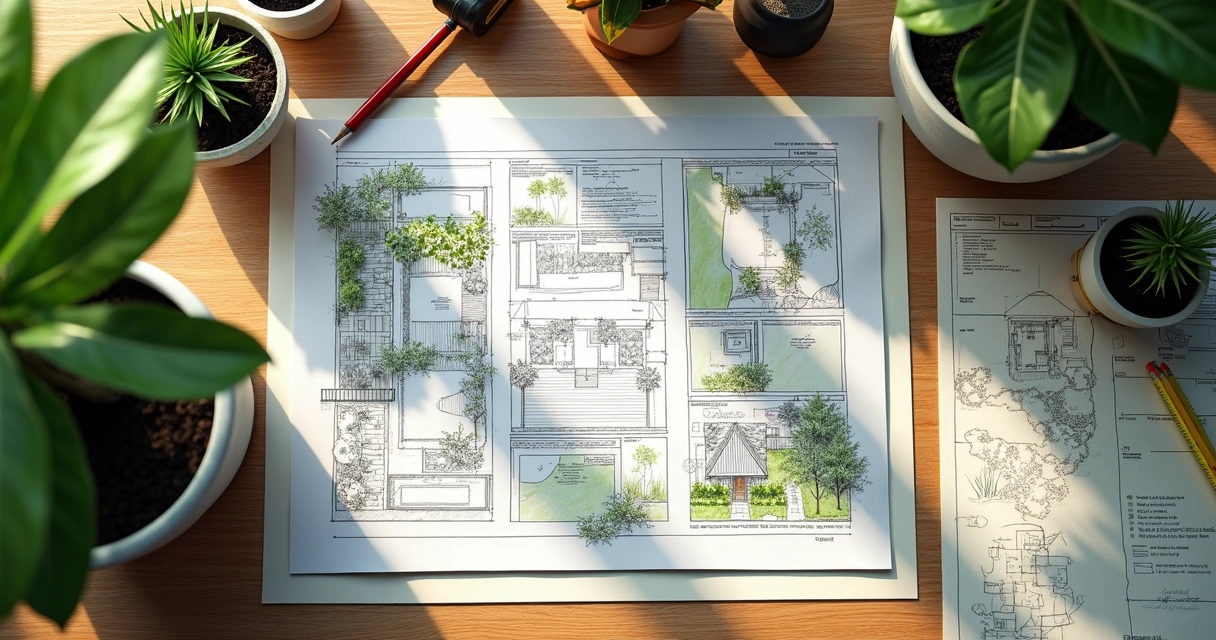
Measurements: base plans that matter
For accurate 3D designs, clear measurements are the backbone. You don’t need professional tools—just patience and a tape measure. Here’s what’s worth measuring:
- Property boundaries – Length and width of entire lot (if possible, check a property survey too)
- Building footprint – Outside walls, doors, window locations, steps
- Permanent features – Trees, large rocks, utility boxes, water taps, septic tanks
- Elevation changes – Note obvious slopes, retaining walls, and drop-offs
If you’re stuck, sketch a basic map and jot measurements in each area. You can mark the locations of power lines, drainage pipes, and restrictions—every detail counts towards accuracy.
Environmental and functional factors
A truly well-planned landscape reflects what you want and what the site “wants to do.”
- Sun and shade patterns – Observe which parts stay shady vs. get sun (morning, midday, evening)
- Prevailing winds – Noting these helps position patios, pergolas, or windbreaks
- Drainage – Areas that stay soggy? Any water that pools after rain?
- Soil type – Sandy, clay, rich, or rocky? This shapes plant selection.
According to research from the University of Delaware Cooperative Extension, addressing these issues up front helps with drainage, sustainability, and long-term landscape health.
Usage, zones, and circulation
Think of how you use—or want to use—your outdoor area:
- Play spaces for kids or pets
- Outdoor kitchens, fireplaces, or pizza ovens
- Dining and relaxation areas
- Pathways and circulation: where do you walk most?
- Privacy screens or sound buffers near neighbors
- Feature lighting and accent details
Mark these spaces on your sketch or describe how you hope to move through the yard. According to Oklahoma State University, noting desired functions (like parking or lighting) prevents surprises mid-project.
Material and plant preferences
Materials matter. If you love the look of smooth travertine but dislike hot surfaces, tell your designer. Are there plants you must have—or that struggle in your climate? Input about colors, textures, and even allergies all make a difference.
- Paving and decking – Stone, wood, composite, concrete?
- Fencing – Style, height, and material preferences
- Favorite (or disliked) plants
- Existing features to keep or remove
Your preferences shape every material and plant selection.
Budget guidelines and phasing
You don’t need a final number up front, but a realistic range keeps plans on target. It’s worth mentioning absolute ceilings and whether you want the project phased (for example, deck now, pool next year). This information steers design choices and helps avoid unnecessary disappointment.
What makes a brief “complete”: practical checklist
Clients sometimes feel nervous about sending “not enough” or “too much.” Here’s a handy checklist for reference.
- Personal inspiration images (2-6 preferred styles, dislikes optional)
- Photos: full site, each property edge, major features, trouble spots, existing plants/structures
- Site sketch with rough measurements and labels (boundaries, elevation, key features)
- Notes on sunlight, shade, wind, flooding, or drainage issues
- List of activities/zones (play, dining, lounging, entertaining, pets) and how often you use each
- Wishlist features (pool, patio, pergola, vegetable beds, water feature, lighting, etc.)
- Material and color preferences or must-haves/must-avoids
- Details about privacy concerns or desired noise control
- Approximate budget, timeline, and whether you want work completed in phases
- Existing site plans, property surveys, or municipal documents if available
Tips for a productive first meeting
Once your brief is ready, schedule a meeting—virtual or in person. This first chat is where details come alive. Be ready to walk your designer through your materials. Ask questions about:
- Experience with similar projects (see recent case studies at Urban Oasis projects)
- The expected design process and review stages
- Construction timelines, permits, and anything that could cause delays
Showing your preparation gives the designer more time to focus on creativity, refining details, and problem-solving, rather than chasing missing info.
How Urban Oasis turns briefs into reality
What happens next? At Urban Oasis, every landscape design brief launches a process built on communication and technical know-how. Using advanced 2D and 3D landscape design software, ideas become immersive visuals that look as real as possible, often long before a shovel hits the ground.
Projects are reviewed in careful phases. The team adapts layouts, refines planting schemes, and adjusts structural features based on your feedback. Open conversations about sustainability, style fit, and practical use are ongoing. Every step aims to keep the project on-time, on-budget, and aligned with your lifestyle.
For those who want to dig deeper into best practices, visit helpful resources like the Landscaping Guide, Techniques, and Benefits or explore focused topics by browsing the Urban Oasis landscaping blog.
Common mistakes and how to avoid them
- Guessing, not measuring: “Eyeballing” rarely works for patios or plant beds. When in doubt, measure three times.
- Forgetting the neighborhood: Your property boundaries may be nearer (or farther) than you think. Check old surveys or request a municipal plan if possible.
- Leaving out drainage: Almost every landscape project deals with water flow. Flood-prone zones or soggy corners should be flagged early.
- Not prioritizing zones: If you try to “do it all” and the site is small, features may feel cramped or forced. List first what you’ll truly use most.
- Skipping inspiration: Style “blind spots” can frustrate both client and designer. Sharing likes AND dislikes helps prevent missteps.
Vision, site realities, and honest preferences—these are the ingredients for a standout brief.
What happens after you send your assets
Designers review your materials. They may call or email follow-ups for missing details, small clarifications, or requests for additional measurements. Then, they combine your preferences with technical standards and site constraints—producing preliminary drafts or stunning 3D renderings for you to visualize changes before any ground is broken.
Expect a round or two of revisions. Good design grows from honest feedback, so don’t hesitate to point out what doesn’t quite fit your vision.

Looking ahead: from planning to reality
In the end, the time you invest in preparing your landscape project planning brief pays off—not just in a smoother process, but in a final result that feels like “home.” The stronger your inputs, the better the output, and the fewer surprises along the way.
If you’re preparing to start your journey, Urban Oasis is ready to listen, translate your vision into stunning designs, and guide you from first sketch to final build. The ideal outdoor retreat, tailored to your needs, is just a plan away.
It all starts with sharing your vision.
Ready to create the perfect space for relaxing, gathering, or entertaining? Fill out our form and start your partnership with Urban Oasis today:
Frequently asked questions
What should I include in a landscape design brief?
Include clear inspiration photos, style references, a list of must-have and preferred features, detailed site photos from all angles, rough measurements of boundaries, building footprints, and existing features. Also share notes about sun and shade, wind and drainage, your preferred materials, privacy concerns, and an approximate budget range. Any municipal site plans or surveys help clarify property boundaries and constraints.
How to prepare for a 3D landscape project?
Start by imagining how you want the space to work and feel. Gather images of landscapes and features you like, list out the different ways you use your yard, and take comprehensive photos from many angles. Make a sketch with basic measurements, identify sunny and shady spots, note areas that flood, and be candid about your budget and project phases. Good preparation means your 3D designer can translate your ideas accurately.
Do I need site photos for my designer?
Yes, detailed site photos are helpful for every 3D or landscaping project. They help your designer “walk” your property virtually, see opportunities or issues, and plan more accurately. Include wide shots, different angles, close-ups of unique features or trouble spots, and even images showing how light changes over the day.
How much detail should my project plan have?
The more specific, the better. Rough sketches, clear measurements, lists of wishes and dislikes, notes on environment (sun, wind, soil), and insights into how you’ll use each area all create a rich starting point. But don’t stress over perfection. Good designers can work with what you have and help fill in any gaps.
What documents help in landscape project planning?
Property surveys, municipal site plans, or any existing blueprints are useful. They clarify boundaries, building footprints, and restrictions. Supporting documents like soil tests or drainage plans also help, as do notes from neighborhood associations (for rules) or photos of similar completed projects that inspire you.