
Imagine standing at the edge of your neglected backyard, picturing a vibrant oasis. But when you reach out to a designer for a 3D landscape rendering, you realize you’re not sure what to send them. What if you miss something important? What if the result isn’t quite what you hoped for? These early uncertainties can slow down or cloud the process. But, a little preparation, some insight into what matters, and the right checklist help everything fall into place.
A thoughtful approach upfront turns generic renders into immersive experiences tailored for you. Projects like Urban Oasis rely on a simple, collaborative journey: understanding the space deeply, translating your lifestyle into visual form, and ticking off technical details that ensure every plant, patio, and pool sits right. In this article, we explain, step by step, exactly how to prepare for 3D landscaping with a checklist that keeps the process smooth for everyone involved.
Every detail tells your story before the first flower blooms.
Why preparation matters for your 3D landscape rendering
Starting a landscape design project often feels a little overwhelming. There’s excitement, mixed with uncertainty. You have dreams about relaxing in a shaded pergola or entertaining by a custom firepit, but what do you actually need to hand over to your designer (and why)?
According to research by the University of Florida, less than a third of homeowners work with designers from the start—but those who do, and communicate clearly, see outcomes much closer to their hopes. The same study highlights that sharing your vision and specifics, from measurements to lifestyle use, bridges the gap between “almost right” and “spot on.”
So, you might ask, why not just show a few photos or say “I want it modern and green”? Well, 3D rendering is incredibly detailed. It brings the space to life before a shovel hits the ground. But, without the right input, the result can feel generic or slightly askew. That’s why preparing what you send is more than a formality—it’s your blueprint for satisfaction in the final design.
Understanding what a 3D landscape rendering delivers
3D landscape renderings allow you to “walk through” your future outdoor space. Sophisticated technology turns measurements, textures, sunlight paths, and plantings into virtual scenes. The main goal? To help you, the homeowner or property manager, get a clear image before any construction begins.
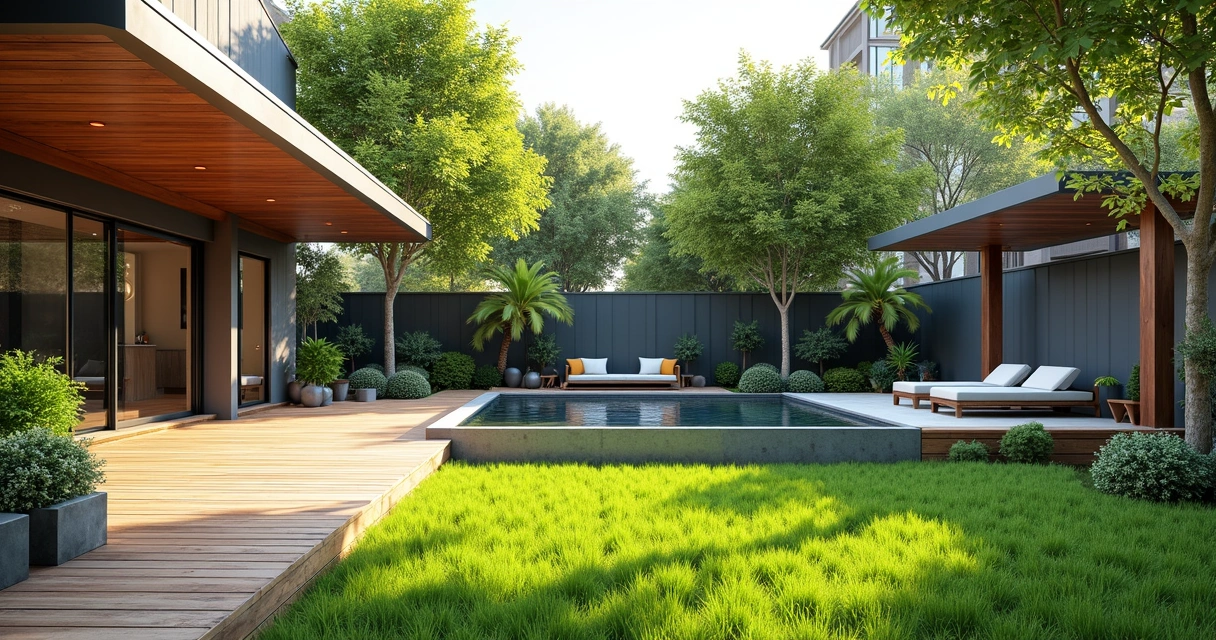
For experienced firms like Urban Oasis, whose team melds technical skill, sustainable practices, and a close partnership throughout the project, renderings are at the heart of their approach. These images help clients decide on layouts and materials, visualize sightlines, and address issues before construction costs pile up. It is the briefing that sets the boundaries and the big possibilities at once.
Before you start: a mindset shift
Is this about accuracy or aesthetics? Both. Great 3D landscaping starts with practical data—measurements, site specifics, sun orientation—but it’s also about immersing your designer in your personal aspirations.
Give your designer a lens, not just a list.
This means including inspiration, mood, and even quirky likes or dislikes, alongside site measurements and photos.
The prep list: what to gather before sending to your designer
If you want a landscape design checklist that covers all bases, think in three layers: site conditions (the “what is”), lifestyle and mood (the “what could be”), and technical details (the “how it fits”).
- Site plan and accurate measurements
- High-quality site photographs (from multiple angles)
- Topographical or elevation data, if available
- Notes about sun patterns, drainage, and utilities
- Existing structures and features
- Your wish list (features, functions, plants, materials)
- Examples of spaces you love (images, magazine clippings, Pinterest boards)
- Budget and timeline expectations
- Any relevant municipal codes or community restrictions
Let’s walk through each of these and unpack why they matter.
1. Site plan and accurate measurements
The backbone of your 3D landscape rendering is a scaled map of your property. Even a hand-drawn sketch can work if it includes accurate dimensions for boundaries, the house, outbuildings, property lines, pathways, and large trees.
For formal projects, a site survey or plat map is ideal. These are legal documents and often include not just boundaries, but also elevations. For high-end renderings, some designers might request digital files like CAD drawings or digital elevation models. The U.S. Geological Survey’s 3D Elevation Program (3DEP) sets standards for highly accurate 3D models. Most residential projects won’t be that complex, but higher accuracy is always helpful.
Here’s what you might include:
- Property lines and outlines of all structures
- Locations of driveways, decks, patios, paths
- Door and window placements (helps with sightlines)
- Existing trees, garden beds, or features to keep
- Utilities, water lines, or septic features
Measurements clear the way for creativity.
2. Getting the right site photos for 3D rendering
Pictures are where the “feel” of a place begins. They help designers understand slopes, views, neighbor sightlines, and existing plants or structures that text and maps simply can’t capture.
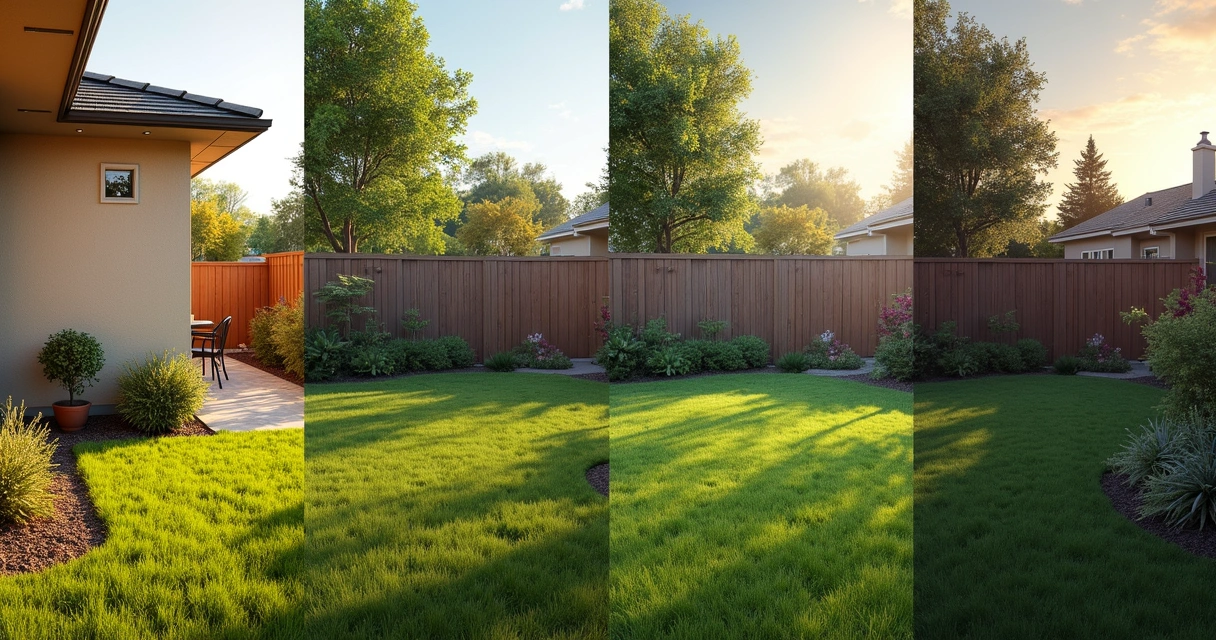
For the best site photos for 3D rendering:
- Take wide shots from each corner of your yard.
- Shoot standing at each entry or exit point to the outdoors.
- Include some close-ups of key features or problem areas (like a shady spot under a tree or an awkward slope).
- Take photos at different times of day to show sun and shadow.
- Capture neighboring structures or landscapes that may impact privacy or the view.
Try to keep objects like bins or bikes out of the shots, unless they’ll always be there. For multi-level yards or larger spaces, a drone photo is a huge help, though not mandatory.
3. Topography and elevation data
Most people forget about slopes, dips, and drainage. Yet, these details can make or break a design—what looks flat in photos may turn out to be uneven in real life. Some cities or counties provide public data, or you might already have a survey map from property documents. Even a rough sketch annotating where the land slopes or puddles after rain helps.
When the team behind Urban Oasis builds high-end decks or patios, knowing a yard dips two feet in one corner completely changes how they approach the design.
Digital elevation models from the USGS are industry standard for major projects. For homeowners, communicating visible slope direction and any problem wet spots is still valuable.
Elevation often decides what thrives and what fails.
4. Utility lines, sun, and drainage notes
Function hides in the details. Where does the sun fall at 3 pm? Do you have soggy patches after a storm? Where are gas or irrigation lines buried? These factors affect everything from plant health to safety for digging. Write notes about:
- Which areas stay dry, which are wet or shaded
- Approximate sun/shade patterns (a simple sketch, or use a sunlight tracking app)
- Known utility line placements (ask your local utility for help if unsure)
- Any “problem” spots, like windy corners, low-lying areas, or traffic through the yard
The best landscapes fit life’s daily rhythm, not just a blueprint.
This kind of info helps designers choose the right trees, place patios in the sunny spots, and avoid headaches later.
5. What stays and what goes: marking existing features
Not everything needs to be new. Some trees or garden beds might be favorites—or city-protected. Mark what you want to keep, what absolutely must go, and anything you feel undecided about. Urban Oasis, for example, often integrates mature trees into patios or designs decks around a client’s favorite rose bush.
A quick list can read something like:
- Retain large oak at rear left (shade and privacy)
- Remove old shed behind garage
- Open to suggestions about existing firepit area
6. Your vision: the wish list and inspiration
The heart of your design comes from what your space could become. To help designers personalize the rendering, use photos, lists, or even quick sketches to share:
- Favorite styles (modern, cottage, drought-resistant, etc.)
- Features you’d love (pool, outdoor kitchen, kids’ play area, native garden, etc.)
- Plants you like or dislike (specific species, allergies, etc.)
- Colors or moods that inspire you (cool and calming, bold, etc.)
- Pictures from magazines, websites, or a Pinterest board
- Notes about how you want to use the space—entertaining, relaxing, gardening, etc.
According to studies by the U.S. Forest Service, clear preferences about landscaping have a major influence on a homeowner’s satisfaction with the finished yard. So don’t worry if what you love is unusual—for designers, “specific is helpful.”
Your preferences shape the design more than any catalog could.
7. Budget and timeline: setting expectations
Your 3D rendering should reflect not only your dream but also your reality. If you have a particular budget range, or if there’s a special event when you want the project completed, mention it upfront. This helps the designer prioritize both the features and the feasibility from the start.
8. By the book: restrictions and codes
Some projects need to meet city or community rules. If you live in a neighborhood with HOA guidelines, or there are local bylaws covering fences, pools, or tree removal, gather those details too. Even just mentioning “pool must be at least 10 feet from the property line” can save redesigns later.
How to share it all: organizing your materials
Once you’ve gathered your maps, photos, notes, and wish lists, how do you actually hand them over to the designer?
- Create a digital folder: Upload everything—photos, scans, PDFs, Word docs, inspiration images—into one cloud folder (Google Drive, Dropbox, etc.).
- Label files clearly: For photos, use names like “Backyard from kitchen door, morning” or “Driveway area, showing slope.”
- List your priorities: A quick bullet list at the top of your “design brief” helps designers spot what really matters to you.
- Mention uncertainties: If you need input—“Is this space big enough for both a pergola and a pool?”—flag it. This opens creative solutions, not dead ends.
A little time organizing speeds up the process and makes for clearer, more personalized communication. Urban Oasis, for instance, finds that a well-organized design brief trims revisions and helps bring your vision to life quicker, often with less back and forth.

Real-life checklist: preparing for your 3D landscape design
Here’s a sample bullet list you can adapt for your own project. You can copy, print, or just use as mental guide:
- Site plan or sketch with accurate measurements
- Photos from all key angles, at different times of day
- Any topographical/sketch data, or notes about slopes/drainage
- Existing feature list (what stays, goes, undecided)
- List of known sun and shade patterns
- Locations of utility lines, buried pipes, or sprinklers
- Inspirational images (from Instagram, magazines, etc.)
- Top features and functions for the new landscape
- Any plant or style preferences
- Budget range (even just a band, like “under 20k”)
- Key dates or timeline wishes
- Any municipal or HOA guidelines you know about
Going further: how style and communication fit in
Wondering if you need to really specify every aesthetic detail? The answer: share as much as you feel comfortable with, but more detail tends to save time and money.

Moodboards have become invaluable in landscape design. If you follow the steps Urban Oasis uses for 2D and 3D designs, you’ll see that visualizing options side by side leads to quicker “yes or no” decisions. The more you show—favorite pool shapes, paving you love, or even a disliked color—the more your designer can customize the 3D rendering.
One odd thing you might not expect: sometimes sharing a “what I don’t want” image is as useful as your favorites! Contradictions are okay. Each note, image, or anecdote helps your designer get into your mindset.
Fitting your preferences into the bigger picture
There’s an art to finding harmony between what you want and what fits your space. Sometimes that means compromise or creative substitution based on site conditions or the local climate. A recent study by the National Center for Biotechnology Information points to how spatial openness and environmental “attractiveness” shape our idea of a perfect landscape. If you give your designer insight into what those terms mean to you—open lawns, privacy hedges, bold plantings—they can adjust the 3D design to balance appearance and comfort.
Many of the top outdoor living trends right now blend modern spatial layouts with standout features, like statement fire pits or unique decks. Bringing a few of these preferences into your brief is a great way to get a rendering that feels “now,” but still personal.
How your prep accelerates the process
It might sound like extra work to prepare for your 3D landscaping project, but there’s a bonus: a more robust and custom output, often with fewer revisions or delays. According to the U.S. Bureau of Labor Statistics, landscape architects bring high levels of expertise, and partnering with one—while supplying complete, detailed background—makes the entire process smoother for both parties. The client and designer find themselves working toward the same vision, faster.
As part of your research, you can find even more tips about the process from this guide on landscaping techniques and benefits. It may inspire a few items you want to add to your prep.
Preparation is the shortest path to a space you’ll love.
A quick guide for commercial landscapes
While we’ve focused on residential projects, commercial site renderings have a few extras to consider:
- Include full building blueprints (if available)
- Gather civil or engineering drawings (for parking, lighting, drainage)
- State all accessibility needs, loading docks, or special commercial codes
- Mention target user groups (shoppers, diners, residents)
Commercial clients of Urban Oasis value the same blend of close communication and technical acumen as residential ones; it’s just that the canvas is bigger, and the rules are a bit tighter.
Trusting the process and finding your team
Being ready and thorough means you can focus on the creative, enjoyable parts of the design process rather than scrambling for missing documents or redesigning for overlooked obstacles. Designers appreciate it—and it often results in a rendering (and eventually, a real space) that feels like you, through and through.
If you’re unsure, start with what you know. Most design firms, like Urban Oasis, are happy to discuss gaps or make site visits if something isn’t clear. Regular communication keeps everyone on the same track.
Spend time prepping, but don’t chase perfection. Sometimes, “good enough” is all you need to kick things off.
Great landscapes start with clear pictures—on paper and in your head.
For ongoing inspiration, process guides, and the latest in outdoor living, browse the Urban Oasis landscaping blog. You’ll find stories, trends, and friendly advice straight from the pros.
Conclusion: your next steps toward an outdoor oasis
If you’re preparing for a 3D landscape design, remember that details matter—but so does your unique story. With the right combination of maps, measurements, site photos, inspiration, and honest wishes, you’ll empower your designer to create a rendering that’s both visually stunning and deeply personal. The result is not just a digital model, but the blueprint for years of outdoor enjoyment.
Urban Oasis is ready to help you turn these preparations into the outdoor space you’ve been picturing. Ready for your own transformation? Start by sharing a few details about your space and goals.
Your dream landscape is just a conversation away.
Fill out the form now and let’s start designing your perfect outdoor retreat.
Frequently asked questions
What should I send for 3D landscape renders?
You should send your designer a complete package that includes a site plan with measurements, multiple photographs of the space from different angles, notes about sun and shade patterns, any known slopes or drainage issues, and a list of any structures or features to keep or remove. Add your inspiration images (moodboards, design styles), preferred materials, a wish list of features (like pools or decks), and notes about budget or any neighborhood guidelines. The more complete your materials, the more personalized and accurate your 3D rendering will be.
How do I prepare for 3D landscaping?
To prepare for 3D landscaping, start by gathering accurate measurements of your yard and creating a simple site plan. Take high-quality photos from different perspectives and at various times of day. Write down observations about sun, shade, drainage, and any notable features (trees, slopes). Look for inspiration images or describe the mood and functions you want, and make a list of both your must-haves and nice-to-haves. Share all these with your designer, and be open to questions—they may spot important details you missed.
What photos are needed for a 3D rendering?
For the best 3D rendering, designers ask for wide photos from each corner of your outdoor space, shots from each doorway or entry to the outdoors, and some close-ups of features or problem spots. Include pictures showing sun and shade at different times (morning, midday, late afternoon). If there are key neighboring structures or privacy concerns, snap photos capturing those too. Drones can help with larger yards, but clear ground-level images cover most needs.
Is a site survey required for 3D design?
A formal site survey is not always required for a 3D landscape design, but it helps ensure accuracy. A legal plat map or property diagram is great, especially for complex projects. For many residential jobs, a careful sketch with measurements, combined with photos and topography notes, is enough. For larger or high-end projects, professional surveys or digital elevation models (like those used in the USGS 3D Elevation Program) might be requested to capture slopes, heights, and boundaries precisely.
What is a landscape design checklist?
A landscape design checklist is a prep list of everything a designer needs to create a great outdoor plan (and, by extension, a 3D rendering). The checklist typically includes: property measurements or site plan, comprehensive site photos, notes about sun, drainage, and topography, a list of existing structures or vegetation to keep or remove, inspiration images, desired features (like decks or a pool), preferred styles or plants, budget range, and any neighborhood or local guidelines. This checklist keeps the project focused and on track and helps designers match your vision.