
That feeling when you step outside and think, “this could be amazing.” You scroll Pinterest, snap photos in garden centers, maybe dog-ear pages in glossy magazines. Those dreamy outdoor spaces start to pile up—a patio here, string lights there, touches of green everywhere. Yet, somehow, translating that inspiration into reality can leave even confident homeowners a little lost. Where does all that creativity go next?
Here’s the journey: you turn collections of pictures and ideas into something tangible and three-dimensional—a lifelike model of your future oasis. That’s what we’ll unpack together.
Why inspiration boards matter—and what they’re missing
Inspiration boards are powerful. Swiping through pages or pictures, you collect fragments of style: color palettes, textures, layouts, maybe an arrangement of pavers or a clever pergola. Yet pinning an image is very different from seeing it fit, to scale, in your real backyard or balcony.
Usually, an inspiration board answers what you want. It rarely answers how it fits your space, your sunlight, your slope, or even your sense of movement through the area.
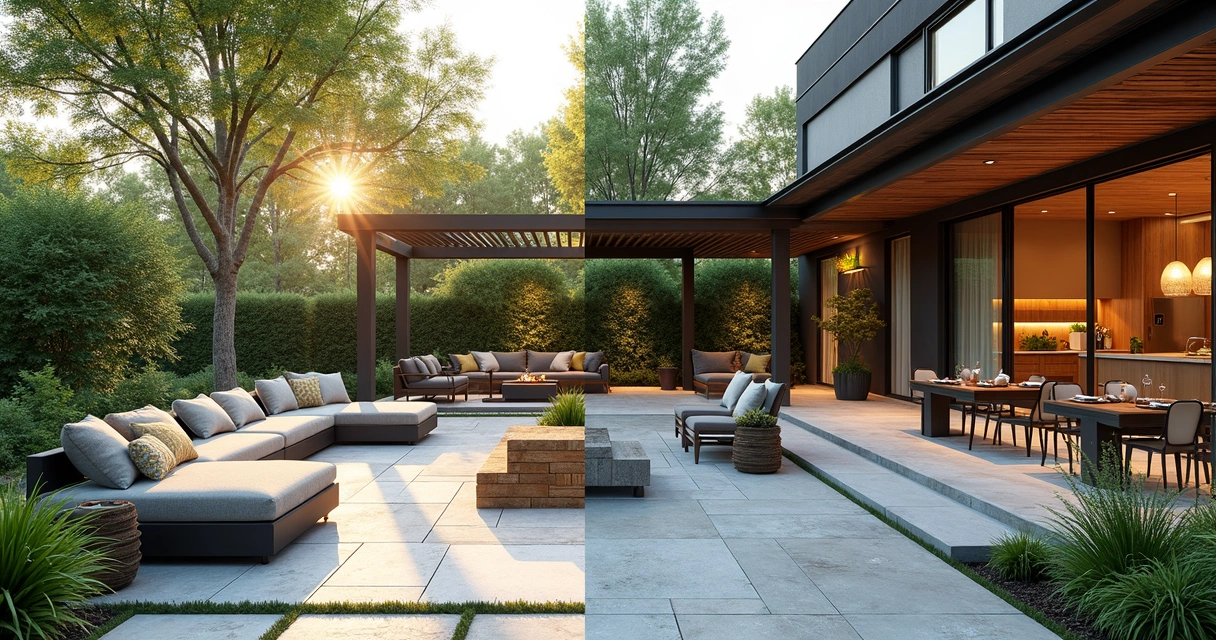
A mood board is a wish; a 3D model is a promise.
To bridge that gap, you need to turn those collected images into a living plan—one that feels as real and compelling as the pins that sparked your imagination. That’s the purpose of custom 3D landscaping: to bring your favorite ideas somewhere between the dreaming and the doing.
From Pinterest to practical design—why 3D modeling changes everything
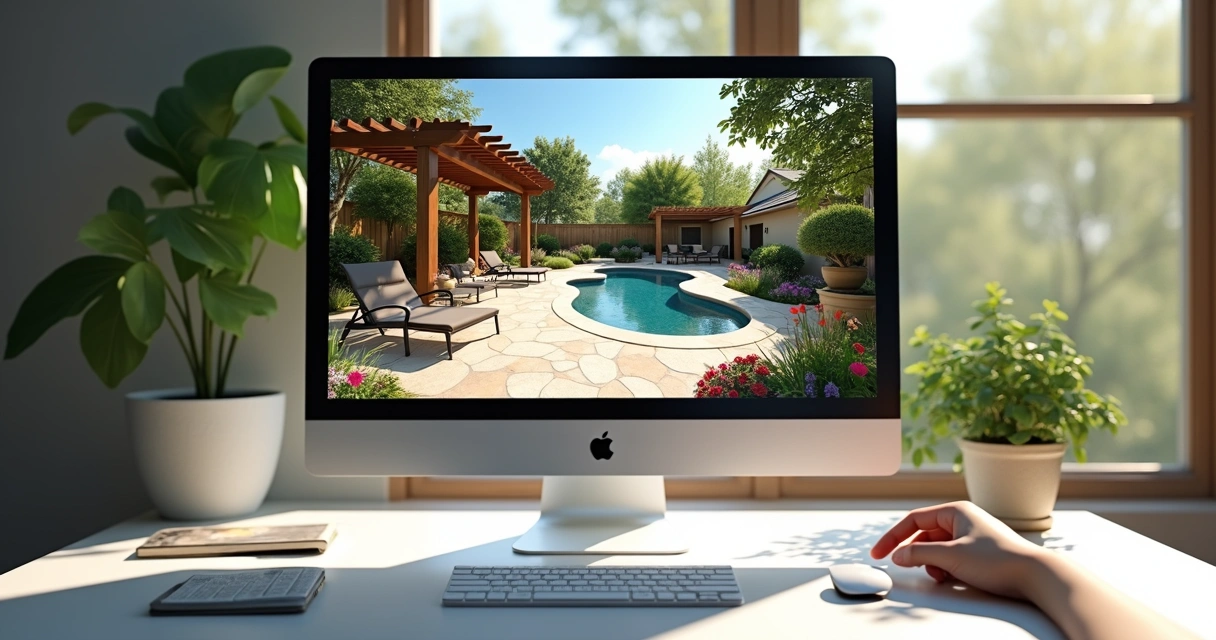
Most of us have a digital collection of stunning spaces. But seeing a photo and walking in your garden are very different experiences. Here’s where immersive technology comes in.
Research shows that 3D visualization makes a dramatic difference in landscape planning. For example, digital intelligent landscape environments let you see garden beds from every angle, test lighting, and swap materials—without lifting a shovel. That ability isn’t just about looks. A 3D model helps you:
- Understand how spaces actually feel when you move through them
- Preview different options side by side, not just in your head
- Communicate your ideas more clearly to designers and builders
- Reduce the risk of costly mistakes or last-minute changes
A systematic review on Building Information Modeling (BIM) in landscape architecture also points out that 3D models lower uncertainty for homeowners, boost collaboration, and even cut down the time to completion. It’s practical magic for bringing an inspiration board to life. Urban Oasis has seen firsthand how a well-built 3D visual helps align everyone—designer, builder, and you—around the same vision.
Gathering your inspiration: making sense of your board
Before you bring your ideas into the digital world, take a moment to organize them. I know it sounds basic, but there’s a quiet thrill in spreading out all your clippings or scrolling your Pinterest saves with purpose. The goal is to filter the noise and find common ground.
Find your themes and patterns
Lay out your inspirations—be they virtual or physical. Ask yourself:
- What colors, materials, and shapes do I keep coming back to?
- Are there repeating elements like fire pits, paths, or raised beds?
- Which images feel most like “me”—not just pretty, but personal?
Try grouping images by mood, feature, or function. Sometimes you’ll see a thread: minimalist lines, earthy tones, lively social spaces, or maybe water features galore. Let your gut lead, then choose 5–10 visuals that illustrate your core style.
Only keep what makes you pause and say, “yes, that feels right.”
Define your priorities
Every dream space is different. Maybe you want a lush escape with room for quiet morning coffee, or a scene-stealing dining area for large gatherings. Define your must-haves and nice-to-haves within your collection.
- Is a low-maintenance garden non-negotiable?
- Do you want space for kids to play or pets to roam?
- Are there accessibility needs—ramps or level surfaces?
- What about sun, shade, privacy, or views?
Clarifying these goals early will focus your 3D modeling process. If you need ideas for low-maintenance, high-impact landscaping, start flagging options that blend beauty with ease.
Mapping your space: measure before you model
Next, a step that might not feel as fun but is absolutely necessary: get familiar with your actual outdoor space. I’ve heard more than one homeowner say, “I never realized how small my patio was until I measured it.” Trust me, it’s surprising how different designs feel once scaled to real life.
Basic site measurements you need
- Overall length and width of your backyard, balcony, or courtyard
- Door and window locations
- Existing features: trees, large shrubs, utilities, drainage, and slopes
- Sun and shade patterns at different times of the day
A rough sketch, simple phone photos with notations, or even a basic floor plan is enough to get started. Just make sure your measurements are accurate. This information is the DNA of your custom 3D landscaping model.
Site quirks to consider
Note odd angles, problematic slopes, wet spots, or ugly views you’d prefer to screen. Your 3D model should work with these quirks, not fight them. It’s actually freeing—you’re not working in an infinite, perfect Pinterest universe but a real, lived-in space.
Every outdoor area has challenges. Embrace yours.
The power of 3D design: visualization that works
Once your inspirations and measurements are gathered, you’re ready to move into the world of 3D. Studies like this analysis of 3D roaming technology explain that custom 3D landscaping models help clients visualize designs more clearly, leading to higher satisfaction and more successful projects.
This is where the difference between “something like this” and “exactly this” becomes obvious. You’ll be able to:
- Walk through your new garden virtually
- Rotate views, check features, and test materials
- Spot potential issues instantly (like a pool in too much shade)
- Tweak placement before breaking ground
At Urban Oasis, clients find that seeing their unique blend of Pinterest inspiration in a 3D model makes decisions dramatically simpler—and more enjoyable.
Step-by-step: shaping your vision into a digital landscape
1. Translate your board into features
Choose elements from your inspiration board and map them to your site. That pergola from your favorite pin? Locate where it could fit on your plan. The lush planting style from another image? See how it might outline your new patio.
This is not about copying each component but borrowing and adapting. If you want ideas for stylish pergolas and shade structures, let your favorites set the mood but format them for your space.
2. Start the 3D modeling (or work with a professional)
You can bring your vision into modeling software yourself or partner with professionals like the team at Urban Oasis. Either way, the process often includes:
- Inputting your site’s dimensions and existing features
- Blocking out basic “zones” for dining, relaxing, or play
- Adding stand-in shapes for key features: decks, patios, pools, planting beds
- Layering in textures, colors, and structures from your inspiration
There’s a surprising intimacy to seeing your real outdoor space from above, then from the side, finally even “walking” through it in a virtual environment.
3. Test, refine, and preview options
The beauty of digital modeling is flexibility. Move a bed, swap a material, shift a sitting area—undo without regret! This is your chance to preview changes without the cost of concrete and stone.
Research from the journal Plants shows that 3D modeling lets designers and users try ideas, preview plantings at different growth stages, and test lighting schemes before construction ever starts.

4. Make decisions based on reality, not guesswork
No two spaces are identical. Your model can reflect:
- Exact sun or shade patterns daily and seasonally
- Actual drainage and slopes
- Local plant varieties, pool orientation, and privacy needs
All those one-size-fits-most Pinterest ideas? They finally become yours—tailored, real, personal.
Techniques and tools for next-level custom 3D landscaping
The tech behind today’s most realistic landscape visualizations draws from advances in both GIS (Geographic Information Systems) and computer-aided design, as discussed in this review of 3D geographic information technology. These days, it’s common for both professionals and ambitious homeowners to use tools that let them render photorealistic versions of their future yards.
Typical workflow for a 3D landscape design
- Site scanning or measuring: Use tape measures, phone apps, or even drones for big sites.
- Entering base plans: Input basic outlines, buildings, and immovable objects.
- Building rough geometry: Draw “masses” for patios, planting beds, pools, or play zones.
- Applying textures: Assign stone, wood, water, or plant textures to these masses for realism.
- Populating landscaping: Add virtual versions of real plants, trees, or structures you’ve picked from your board.
- Lighting effects: Preview day, evening, or even decorative lighting for mood-setting.
- 3D walkthroughs: Use camera paths to simulate walking, sitting, or viewing from key spots in your yard.
- Render and refine: Review with friends, family, or professionals for feedback and tweaks.
If you want a simple breakdown of these concepts, Urban Oasis has a handy guide to 2D and 3D landscape design approaches for outdoor spaces.
How much tech do you need?
The truth is, you don’t always need a supercomputer or years of design expertise. Free and pro-level apps exist for home users, as do high-end, professional-grade tools for larger or trickier projects. Sometimes, building a digital model is just part of your process. You might:
- Test ideas yourself, then hand the model off to a builder
- Collaborate closely with a firm like Urban Oasis, providing your board and letting their team build the 3D visualization
- Work iteratively, adjusting your model as new ideas surface
The best tool is the one that makes your inspiration clear.
For more on the range of methods and when each fits, see Urban Oasis’ guide to landscaping techniques and benefits.
Collaborating with design professionals for real impact
Yes, you can model on your own, but working with experienced designers changes everything. Urban Oasis, for example, places communication at the heart of every project. Their team translates your images and wishes into working plans, refining them through multiple feedback rounds.
Digital models allow your vision to be “test-driven” by all decision-makers before construction starts. That’s invaluable—especially when making meaningful investments in outdoor spaces built for both function and style.
What to expect when you partner with a pro
- Discovery and consultation: Sharing your board, priorities, and needs
- Site assessment and survey: Evaluating, measuring, and photographing the area
- Drafting the 3D model: Iterating quickly based on your feedback
- Material selections: Reviewing stone, plants, furnishings, and lighting together
- Revisions and refinement: Testing ideas in the model before any commitment
- Final approval and build: Moving from digital to physical with total clarity
As in this workflow, you become the co-author. The finished design is yours not just by signature, but by every small choice along the way. And the process feels genuinely creative—even joyful.
Troubleshooting: common worries and mistakes
Okay, not every step is smooth. Sometimes, you hit snags or face hesitation. A few quick truths:
- The model never matches the board exactly—and that’s good! Your space and needs are unique.
- Fear of “getting it wrong” holds more people back than lack of design skill. One tweak at a time, finished is better than perfect.
- Lighting, privacy, and maintenance often don’t appear in inspiration boards. Always ask: how does this space feel at night, or a year from now?
If you’re focused on creating the perfect place for entertaining outdoors, test seating layouts and party flows in your model. Move pieces, simulate scenarios; it’s all part of the fun.
A good designer will guide you through what works, when it matters, and why an idea that looks perfect in a pin might need adjusting.
How 3D modeling improves your final outdoor space
Research shows that immersive modeling does more than shorten the distance between wishful thinking and real outcomes. It also leads to greater satisfaction, more adaptable solutions, and fewer regrets (advantages of 3D visualization).
A custom 3D landscaping model:
- Brings all partners—homeowners, designers, builders—into alignment before work begins
- Reduces surprises, overruns, and misunderstandings about space and materials
- Enables confident, creative decisions while seeing “the big picture” at all times
See it, love it, then build it.
That is the final power of turning your inspiration into reality.
Next steps: bringing your 3D dream to life
If you’ve ever wished your Pinterest board could jump off the screen and root itself in your real backyard, the path is more accessible than you think. From organizing your inspiration, mapping your site, and building a 3D model, to partnering with a team like Urban Oasis, every step brings your vision closer to reality.
Are you ready to see your ideas put into motion, not just imagined? It starts by reaching out, sharing your inspirations, and building that bridge from images to experience. The sense of satisfaction that comes from finally seeing your outdoor vision in detailed 3D is worth the journey.
Stop just pinning it. Make it real.
Ready to shape your ideal outdoor space? Tell Urban Oasis about your dream—then watch it come to life, in vivid detail.
Frequently asked questions
How do I turn my Pinterest board into 3D design?
Start by gathering your Pinterest favorites and organizing them by mood, materials, and features. Next, measure your outdoor area so you have accurate dimensions. Use 3D design software to create a digital version of your space, then add features from your inspiration board. Place structures, plantings, or furnishings virtually, adapting them to fit your real site. Many people find working with professionals like Urban Oasis helpful for turning their ideas into a polished model that works for their space.
What tools are best for custom 3D landscaping?
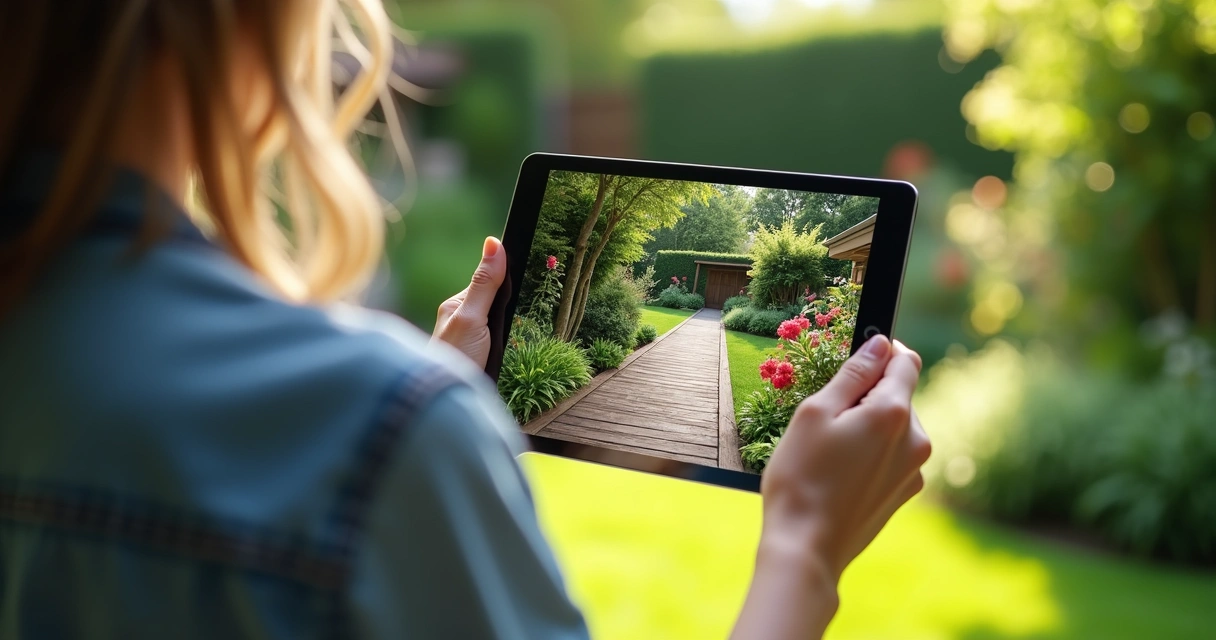
The best tool depends on your goals and experience. There are user-friendly options for beginners and professional software for experts. Typically, you’ll want a tool that allows import of site measurements, flexible placement of landscaping features, and photorealistic rendering. Some tools even offer virtual walkthroughs or augmented reality, letting you “visit” your dream design before building. Urban Oasis leverages advanced modeling technology to create personalized, accurate models for clients.
Is it worth it to create a 3D landscape model?
Absolutely. According to research on the impact of 3D modeling in landscape design, custom models help homeowners make clearer decisions, visualize options, prevent mistakes, and improve overall satisfaction with the finished space. For any significant project, the ability to test ideas and refine details virtually saves money, time, and frustration.
How much does 3D landscape design cost?
Costs vary based on project size and the complexity of the model. Simple DIY projects may only require software that is free or under $100. Professional modeling services, like those offered by Urban Oasis, add value through precision, material selection, and guided revisions; prices typically range from a few hundred to several thousand dollars, depending on the scale and detail involved. The best way to get a precise quote is to discuss your goals and site with a designer.
Can I make a 3D landscape without experience?
Yes, you can! Many modern apps are designed for beginners. You can drag and drop features, try out ideas, and preview results without specialized skills. For complex designs or large spaces, working with professionals can help refine the vision and ensure technical details are correct. Even so, your input and inspiration guide the process, so don’t hesitate to try—no expert background required.